
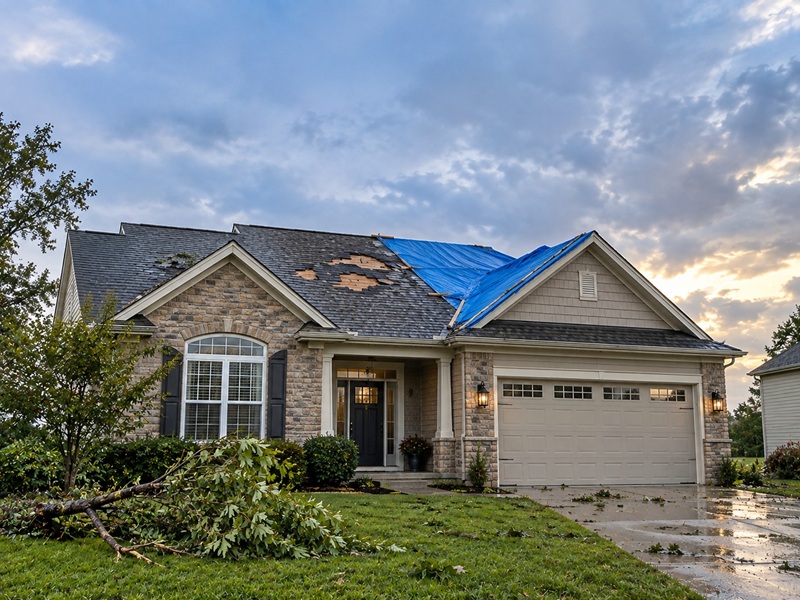
To file a roof insurance claim after a storm, make the roof safe, take photos, read your policy, call your insurer to report the damage, and meet the adjuster with a roofer’s written estimate in hand. Report it quickly, because most policies require prompt notice.
A storm claim can feel confusing, and mistakes early on can cost you money later. Throwing away damaged shingles too soon, signing the wrong contractor paper, or missing a deadline are common problems.
This guide, written with the Roofing Cop team, walks you through each step in plain English. You will also see how to avoid the most common reasons claims get reduced or denied.
Quick answer (7 steps):
- Stay safe and stop further damage
- Document everything with photos and video
- Read your policy and check your deductible
- Report the claim to your insurer
- Get a roofer’s inspection and written estimate
- Meet the adjuster and compare the estimates
- Review the payment, approve repairs, and keep records
Insurance rules differ by state and by policy. This article is general information, not legal or insurance advice. Always follow your own policy and local rules.
Step 1: Stay Safe and Stop Further Damage
Your safety comes first, and your policy usually expects you to prevent more damage. Do not climb onto a storm-damaged roof.
Do this right away:
- Check for hazards: Fallen power lines, leaking gas, or a roof that looks like it might collapse. Call emergency services if needed.
- Move belongings away from leaks and cover furniture.
- Place buckets under active drips.
- Arrange temporary repairs, such as a tarp or board-up, if it is safe and can be done by a professional.
Keep every receipt. Most policies cover reasonable emergency repair costs, but you need proof. Do not start permanent repairs before the insurer has a chance to inspect, unless the damage is urgent.
Step 2: Document the Damage Before You Clean Up
Good evidence is the single best thing you can bring to a claim. Take more photos than you think you need.
What to capture:
- Wide shots of the whole house and roof from the ground
- Close-ups of missing, cracked, or dented shingles and dented gutters or flashing
- Interior ceiling stains, wet insulation, and attic damage
- Fallen branches or trees on the roof
- Date and time on photos, plus a short video walkthrough
Also save:
- The date of the storm and the type (hail, wind, tornado, hurricane)
- A weather report or local news article that confirms the storm in your area
- Photos of the roof from before the storm, if you have them (real estate listing photos or older pictures often help)
Do not throw away damaged materials (such as shingles or debris) until the adjuster has seen them, unless they are unsafe.
Step 3: Read Your Policy and Check Your Deductible
Before you call, spend 10 minutes reading your policy. It tells you what is covered and how much you pay first.
Look for these items:
| What to check | Why it matters |
|---|---|
| Covered perils | Wind, hail, and falling trees are usually covered. Flood usually is not. |
| Deductible type | Some policies have a flat amount (like $1,000). Others use a percentage of your home’s insured value (often 1% to 5%) for wind or hail. |
| ACV vs. RCV | Actual Cash Value pays for the roof minus depreciation. Replacement Cost Value pays closer to the cost of a new roof. |
| Roof age or payment schedule | Some policies reduce payment on older roofs. |
| Claim deadline | Many policies require prompt notice, and some states set specific time limits. |
| Cosmetic damage exclusion | Common on some metal roofs, where dents may not be covered. |
Example: If your home is insured for $300,000 and you have a 2% wind and hail deductible, you pay the first $6,000 of the covered damage. If the repair costs $5,500, filing a claim would not pay out anything.
Step 4: Decide Whether to File a Claim
Not every damaged roof needs a claim. Compare the repair cost with your deductible before you decide.
| Situation | Usually best move |
|---|---|
| Repair cost is well above the deductible | File a claim |
| Repair cost is close to or below the deductible | Pay out of pocket, and think twice about filing |
| Roof is old and near the end of its life | Ask a roofer whether storm damage is clear, because insurers may call it wear and tear |
| Damage is small and isolated | See whether a simple repair is enough. Read roof repair vs. roof replacement |
Claims may affect renewal or premiums with some insurers, and rules vary by state. Ask your agent general questions before you file, and remember you still have deadlines.
Step 5: Report the Claim to Your Insurer
Call your insurance company or use its app or website to open a claim. Do this as soon as reasonably possible.
Have this ready:
- Policy number and contact details
- Date, time, and type of storm
- A short description of the damage
- Your photos and receipts for emergency repairs
During the call:
- Write down the claim number, the name of the person you spoke to, and the date.
- Ask what the next steps are and when an adjuster will contact you.
- Ask whether the check will include your mortgage company as a payee. This is common, and the lender may need to endorse it.
- Keep it factual. Describe what you see and do not guess about causes.
Follow up in writing (email or the claim portal) so you have a record.
Step 6: Get an Independent Roof Inspection and Written Estimate
Ask a licensed, insured local roofer to inspect the roof and give you a written estimate with photos. This gives you something to compare with the insurer’s numbers.
How to pick a roofer after a storm:
- Check the license, insurance, and local references
- Ask for a written scope with line items (tear-off, underlayment, flashing, ventilation, decking, permits, disposal)
- Be careful of door-to-door contractors who promise to “cover your deductible” or push you to sign the same day. Read our advice on choosing a roofing contractor after a storm
Important: Do not sign a contract that gives the contractor control of your claim (often called an assignment of benefits) without understanding it. Some states restrict or limit these agreements. If you are unsure, ask your insurer or a local attorney.
Expert Tip from the Roofing Cop team: Ask your roofer to be present when the adjuster inspects the roof, if your insurer allows it. Roofers often spot storm marks, such as hail bruises and creased shingles, that are easy to miss. Have them point out the damage directly and note it in the adjuster’s report.
Step 7: Meet the Adjuster
The adjuster works for the insurer and inspects the damage to decide coverage and the payment amount. Treat it as a professional meeting.
Before the visit:
- Print or save your photos, roofer’s estimate, and storm date
- Make a list of all damaged areas, inside and outside
During the visit:
- Walk with the adjuster and point out each damaged spot
- Ask questions if you do not understand something
- Ask whether they will inspect the attic and the roof deck
- Do not guess or agree to anything you do not understand
After the visit:
- Ask for a copy of the adjuster’s report and estimate in writing
- Compare it line by line with your roofer’s estimate
Step 8: Review the Insurer’s Decision and Payment
The insurer will approve, partly approve, or deny the claim, and it should tell you in writing. Many states have rules on how fast insurers must respond, so check your state’s insurance department website for local timelines.
Understand how payment works:
- ACV policy: You are paid the depreciated value first. Some policies then pay recoverable depreciation after repairs are complete.
- RCV policy: Often pays the actual cash value first, then the rest after you show the work is done.
- Deductible: Subtracted from the payment.
- Mortgage lender: May hold or co-sign the check.
If the estimate seems too low:
- Compare each line item with your roofer’s estimate
- Ask the adjuster or claims rep to explain differences, such as missing items like flashing, underlayment, or code-required upgrades
- Send a written request with photos and your roofer’s estimate to support a re-inspection or supplement
Step 9: Approve Repairs and Keep Records
Once the claim is settled, you can schedule the work.
- Get a written contract with the price, material, timeline, and warranty
- Do not pay the full amount upfront. Use a payment schedule tied to progress
- Keep the final invoice, permits, photos of finished work, and warranty papers
- Send the completion papers to your insurer if they owe recoverable depreciation
- Consider upgrading while you are at it. Ask your insurer about discounts for impact-resistant roofing, and compare options in our guide to the best roofing materials for residential homes. If you are thinking about metal, see how metal roofing compares with composite shingles
Why Roof Claims Get Denied or Reduced (and How to Avoid It)
| Common reason | How to avoid it |
|---|---|
| Wear and tear or age | Get a roofer’s report that separates storm damage from age, and show storm evidence |
| Late reporting | Report promptly and keep a written record |
| Poor maintenance | Keep past repair and inspection records |
| Missing evidence | Take dated photos and keep the storm report |
| Damage not caused by a covered event | Show the storm date and matching damage pattern |
| Cosmetic damage exclusion | Read your policy before you choose a roof type |
What If Your Claim Is Denied?
A denial is not always the end. You can take these steps:
- Ask for the denial in writing, including the policy section they rely on.
- Review your policy and compare it with the reason given.
- Request a re-inspection and send new evidence, like a second roofer’s report.
- Check for an appraisal clause, which lets both sides use appraisers to settle a value dispute.
- Contact your state’s department of insurance, which can accept consumer complaints and explain your rights.
- Consider professional help, such as a public adjuster or an attorney. Public adjusters typically charge a percentage of the settlement, and fees are regulated in many states, so ask for the fee in writing first.
Typical Timeline
| Stage | Typical timing |
|---|---|
| Storm happens and you secure the home | Day 0 to 2 |
| Photos taken and claim reported | Day 1 to 7 |
| Adjuster inspection | Often within 1 to 3 weeks (varies a lot after major storms) |
| Decision and payment | Often several weeks, depending on the state and claim size |
| Repairs | Depends on contractor schedules and materials |
Timing depends heavily on your insurer, state rules, and storm volume. Use your claim rep’s estimate.
Frequently Asked Questions
How long do I have to file a roof insurance claim after a storm?
It depends on your policy and state. Many insurers require prompt notice, and some states set deadlines from one to several years. Do not wait. Check your policy and report storm damage as soon as you notice it, because delays can weaken your claim.
Will filing a roof claim raise my insurance rates?
It can, but it varies by insurer, state, and claim history. Some insurers treat weather claims differently from other claims. Ask your agent general questions before filing, and compare the repair cost with your deductible to decide if a claim makes sense.
Does homeowners insurance cover a full roof replacement?
Sometimes. Insurance may pay for replacement if storm damage is widespread and covered, and your policy terms allow it. Roof age, depreciation, deductibles, and exclusions affect the payout. Older roofs may receive only actual cash value, not full replacement cost.
Should I hire a public adjuster for a roof claim?
It can help on large or disputed claims, but it is not required. Public adjusters usually charge a percentage of the settlement. Ask for the fee in writing, check their license in your state, and compare it with what an extra payout might realistically add.
Final Verdict
Most storm claims go better when you act fast, document everything, and bring a roofer’s estimate to the adjuster. Read your policy first, know your deductible, and keep every receipt and message.
If you are unsure whether the damage is enough for a claim, or whether you need a repair or a full replacement, start with a written inspection. Need help checking storm damage on your roof? The team at Roofing Cop can inspect your roof and explain your options.